~
~
:wq

Showing posts with label English. Show all posts

Saturday, 27 June 2015

Passing STDIN or positional arguments to python code enbedded in bash script (here-documents)

spanish version - all english posts

This is a short post about bash's here-documents and python embedded scripts. Very useful to write quick and dirty scripts.

The issue here is to demonstrate how to pass either positional arguments or stdin input (pipe) to python code inside a bash's here-document block of code

Proposal, write a bash script or function that accepts either pipe input or positional parameters and pass them to a python block of code within the bash script.

First approach: ever wonder how to pass bash positional args to inside python here document? Here is the code:

#! /bin/bash

[... bash stuff ...]

# our python block
python - $@ << EOF
import sys
print sys.argv[:]
EOF

[... more bash stuff ...]

this is how it works:

bash firstapproach.sh one two
['-', 'one', 'two']

Let's go ahead... What if you want to accept ether standard input or positional args? this is IMHO a good approach to the problem (using a function to make the code clearer):

#! /bin/bash

[... bash stuff ...]

# the function which passes to our python here-document either
# positional args or STDIN input
# pipe input is only used if no positional args are present:
myfunct () {
[[ $# > 0 ]] && ARGS=$@ || read ARGS
python - $ARGS << EOF
import sys
print sys.argv[:]
exit
EOF
}

[... more bash stuff ...]

And here is the resulting output of both the STDIN and the positional args:

~$ echo hola amigos | myfunct
['-', 'hola', 'amigos']

~$ myfunct hasta luego
['-', 'hasta', 'luego']

HTH

Tuesday, 24 December 2013

Force reinstall of configuration files

Some times things go wrong and you want to restore default configuration files.

This quick tip is devoted to debian based distributions

One may think that the apt-get flag - -reinstall will do the trick, however that's not enough. You'll need to provide some not-so-obvious arguments:

apt-get -o Dpkg::Options::="--force-confmiss" install --reinstall package-name

With that command the missing configuration files and missing directories will be re-deployed.

If you need to, you may want to remove the messed configuration files that you want to restore before issuing the command.

Wednesday, 1 February 2012

Touchpad freezes sometimes in Ubuntu 11.10. Workaround

Randomly and fortunately not too often (maybe two or three times in the last 5 months) the mouse cursor freezes on my laptop (Ubuntu 11.10 64Bits). This usually happens when using thunderbird, however I don't have a test-case to report to launchpad yet.

This is quite annoying and what I did in the previous occasions was to hit CTRL-ALT-F1 and restart lightdm.

However It has just happened once again right now, so I did a quick search and I've found a clean workaround to bring (activate) the touchpad again. Simply launch a terminal (ctrl-alt-t) if you already don't have one at hand and execute:

synclient TouchpadOff=0

Credits to effenberg0x0 from ubuntu forums.

Synclient (from it's man page): is a program that lets you change your Synaptics TouchPad driver for XOrg/XFree86 server parameters while X is running.

Further info:

  • man synaptics
  • man synclient

Thursday, 5 January 2012

Quick check of services status

This is just quick and dirty post.

A oneliner to check if all your server services have started rightly after a reboot. This first attempt is aimed for Debian and derivatives:

checkservices () { for service in /etc/rc2.d/S*; do STATUS=$(/etc/init.d/$(ls -l $service | awk '{print $NF}') status 2>/dev/null); [ "$STATUS" != "" ] && printf "Status of ${service##*/}:\t$STATUS\n"; done; }

Example:

root@server:~# checkservices
Status of S04openvpn:    * VPN 'server' is running
Status of S05bind9:      * bind9 is running
Status of S05dhcp3-server:      Status of DHCP server: dhcpd3 is running.
Status of S05sysstat:    * sadc cron jobs are enabled
Status of S06postfix:    * postfix is running

Make it portable (Did I said that this was a quick and dirty post?) :-D

checkservices () { for service in /etc/rc$(runlevel|awk '{print $NF}').d/S*; do STATUS=$(/etc/init.d/$(ls -l $service | awk '{print $NF}') status 2>/dev/null); [ "$STATUS" != "" ] && printf "Status of ${service##*/}:\t$STATUS\n"; done; }

Example (centos server):

[root@server ~]# checkservices
Status of S05kudzu:     kudzu has run
Status of S06cpuspeed:  cpuspeed is stopped
Status of S07iscsid:    iscsid (pid  1980) is running...
Status of S08ip6tables: Firewall is stopped.
[...]

Sunday, 16 October 2011

Disable guest session in Ubuntu 11.10 (oneiric ocelot)

spanish version - all english posts

How to disable the guest account in Ubuntu 11.10?
Ubuntu 11.10 uses lightDM as the default display manager. Certainly it looks cooler than the old GDM, but by default it comes (in the ubuntu package) with a guest session enabled which is at least an arguable decision from many points of view (utility, security, etc). To disable that guest login account option edit the lightdm's config file /etc/lightdm/lightdm.conf and put on it the parameter allow-guest=false. After that the configuration file should look like:
~$ cat /etc/lightdm/lightdm.conf

[SeatDefaults]
greeter-session=unity-greeter
user-session=ubuntu
allow-guest=false
To achieve the changes restart the lightdm daemon:
sudo restart lightdm
That's it. You have a detailed description of all (many) the options that can be used in the configuration file lightdm.conf at /usr/share/doc/lightdm/lightdm.conf. Let me copy it here to make easier for you to consult them:
#
# General configuration
#
# start-default-seat = True to always start one seat if none are defined in the configuration
# greeter-user = User to run greeter as
# minimum-display-number = Minimum display number to use for X servers
# minimum-vt = First VT to run displays on
# user-authority-in-system-dir = True if session authority should be in the system location
# guest-account-script = Script to be run to setup guest account
# log-directory = Directory to log information to
# run-directory = Directory to put running state in
# cache-directory = Directory to cache to
# xsessions-directory = Directory to find X sessions
# xgreeters-directory = Directory to find X greeters
#
[LightDM]
#start-default-seat=true
#greeter-user=lightdm
#minimum-display-number=0
#minimum-vt=7
#user-authority-in-system-dir=false
#guest-account-script=guest-account
#log-directory=/var/log/lightdm
#run-directory=/var/run/lightdm
#cache-directory=/var/cache/lightdm
#xsessions-directory=/usr/share/xsessions
#xgreeters-directory=/usr/share/xgreeters

#
# Seat defaults
#
# xserver-command = X server command to run
# xserver-layout = Layout to pass to X server
# xserver-config = Config file to pass to X server
# xserver-allow-tcp = True if TCP/IP connections are allowed to this X server
# xdmcp-manager = XDMCP manager to connect to (implies xserver-allow-tcp=true)
# xdmcp-port = XDMCP UDP/IP port to communicate on
# xdmcp-key = Authentication key to use for XDM-AUTHENTICATION-1 (stored in keys.conf)
# greeter-session = Session to load for greeter
# greeter-hide-users = True to hide the user list
# user-session = Session to load for users
# allow-guest = True if guest login is allowed
# guest-session = Session to load for guests (overrides user-session)
# session-wrapper = Wrapper script to run session with
# display-setup-script = Script to run when starting a greeter session (runs as root)
# greeter-setup-script = Script to run when starting a greeter (runs as root)
# session-setup-script = Script to run when starting a user session (runs as root)
# session-cleanup-script = Script to run when quitting a user session (runs as root)
# autologin-guest = True to log in as guest by default
# autologin-user = User to log in with by default (overrides autologin-guest)
# autologin-user-timeout = Number of seconds to wait before loading default user
# autologin-session = Session to load for automatic login (overrides user-session)
# exit-on-failure = True if the daemon should exit if this seat fails
#
[SeatDefaults]
#xserver-command=X
#xserver-layout=
#xserver-config=
#xserver-allow-tcp=false
#xdmcp-manager=
#xdmcp-port=177
#xdmcp-key=
#greeter-session=example-gtk-gnome
#greeter-hide-users=false
#user-session=default
#allow-guest=true
#guest-session=UNIMPLEMENTED
#session-wrapper=lightdm-session
#display-setup-script=
#greeter-setup-script=
#session-setup-script=
#session-cleanup-script=
#autologin-guest=false
#autologin-user=
#autologin-user-timeout=0
#autologin-session=UNIMPLEMENTED
#exit-on-failure=false

#
# Seat configuration
#
# Each seat must start with "Seat:".
# Uses settings from [SeatDefaults], any of these can be overriden by setting them in this section.
#
#[Seat:0]

#
# XDMCP Server configuration
#
# enabled = True if XDMCP connections should be allowed
# port = UDP/IP port to listen for connections on
# key = Authentication key to use for XDM-AUTHENTICATION-1 or blank to not use authentication (stored in keys.conf)
#
# The authentication key is a 56 bit DES key specified in hex as 0xnnnnnnnnnnnnnn.  Alternatively
# it can be a word and the first 7 characters are used as the key.
#
[XDMCPServer]
#enabled=false
#port=177
#key=

#
# VNC Server configuration
#
# enabled = True if VNC connections should be allowed
# port = TCP/IP port to listen for connections on
#
[VNCServer]
#enabled=false
#port=5900

Wednesday, 12 October 2011

I sign it too!

X11 - No words :-)
This applies to almost every aspect of GNU/Linux nowadays

Sunday, 17 April 2011

Set UUID on reiserfs partitions (fun with bash)

spanish version - all english posts

I've just realized that the reiserfs partitions of an old PC are not associated with their corresponding UUID in /etc/fstab. I usually use UUIDs in fstab to avoid problems when adding/removing disks.

This particular PC has several partitions with reiserfs filesystem. Many years ago I preferentially used reiserfs instead of ext2 for obvious reasons. With the advent of ext3 I stopped using the reiser filesystem on new installations. But my old PCs remained with reiserfs. That happened (and remained) over the time with non-system partitions (home, chroot, etc...)

Out of curiosity I've tried to find out how old these partitions are, but I have not been able (perhaps a seasoned forensic guru can help me ... debugreiserfs does not show this information). The oldest files I can see have access dates of 2004 but I'm sure the partitions are much older .... enough rambling!

Turning back to the UUID issue. The reiser partitions are not associated with a corresponding UUID:

root@oldandbeloveddesktop:~# debugreiserfs /dev/sda7 | grep UUID
debugreiserfs 3.6.21 (2009 www.namesys.com)

UUID: 00000000-0000-0000-0000-000000000000
root@oldandbeloveddesktop:~# blkid /dev/sda7
/dev/sda7: TYPE="reiserfs"

So we'll have to generate the UUIDs and assign them to their corresponding reiserfs partitions.

The fun part: We will do it in a single command:

root@oldandbeloveddesktop:~# mount -t reiserfs | while read part; do umount ${part%% *}; reiserfstune --uuid $(uuidgen -r) ${part%% *}; mount ${part%% *} ; done

That's it, we have assigned an UUID to each reiserfs partition. We can verify it using blkid:

root@oldandbeloveddesktop:~# blkid | grep reiserfs
/dev/sda7: TYPE="reiserfs" UUID="3cfa0f14-c35b-49fc-82a8-ff3e6e225af8"
/dev/sda10: TYPE="reiserfs" UUID="76255e20-92b1-4352-a604-6b371eb5ace0"
/dev/sda11: TYPE="reiserfs" UUID="06c74789-d403-408a-898f-b8e8880d3d3a"

We can now edit their corresponding fstab entries. It's the turn for sed and some more fun. Just run:

root@oldandbeloveddesktop:/etc# for part in $(mount -t reiserfs); do sed -i "/^\/dev.*reiser/ s@^${part%% }@#original ${part%% }\n$(blkid ${part%% }|awk '{print $NF}') @" /etc/fstab; done
root@oldandbeloveddesktop:/etc# mount -a -o remount

And that's all folks!

As this post is getting very short, lets fill it with a step by step explanation of the process.

The first command that helped us to assign a UUID to each partition reiserfs is summarized in the following steps.

  1. using "mount -t reiserfs" we get the list of the reiserfs partitions in use.

  2. the output will be passed to "bash's while" which will iterate each line of output assinging each outputed line to the "part" variable.

  3. Using bash parameter expansion we take only the partition device, which graphically can be reperesented as:

    root@oldandbeloveddesktop:~# part="/dev/sda7 /home reiserfs defaults 0 2"
    root@oldandbeloveddesktop:~# echo ${part%% *}
    /dev/sda7
    
  4. for each partition:

    4.1) unmount the partition with "umount"

    4.2) generate a random uuid with uuidgen:

    uuidgen -r
    

    4.3) and assign it to the partition using reiserfstune command.

    4.4) remount the partition.

The second command, which edits "/etc/fstab" entries replacing each /dev/sdXY string with its corresponding UUID, is detailed in the following steps:

  1. as the first command we use "mount -t reiserfs" to get the list of reiserfs partitions (mounted) in the system.

  2. as before, we pass each line from the output to ''$part'' using bash's "while". Remember that ''${part%% *}'' will correspond to each of the partitions in the format '/dev/sdXY'.

  3. For each reiserfs partition we execute sed infile editin the /etc/fstab file. The sed command can be divided into:

    3.1) a first part where you select only the lines of the reiserfs partitions. Those with the format:

    /dev/...............reiser............
    

    3.2) on the previous selection sed will just edit the field "/dev/sdXY". 3.3) and sed will replace it with two lines: a comment header (just to remember which was the original partition's name), and the corresponding fstab's entry with the UUID.

    3.3.1) I get the UUID value with "blkid" keeping just the UUID value, which corresponds to the last field in the output if we divide it into spaces (awk NF). For example if you originally had lines with the format:

        /dev/sda10 /chroot reiserfs defaults 0 2
    
    they will be replaced with::
        #original /dev/sda10
        UUID="76255e20-92b1-4352-a604-6b371eb5ace0"  /chroot reiserfs defaults 0 2
    

Well, that's all. The objective has been achieved: We have assigned a UUID for each of the reiserfs partitions, and we have had some fun time playing with the shell.

Sunday, 12 December 2010

gPXE boot from Grub2

spanish version - all english posts

The problem that I'm facing is that I need to boot a PC in a LTSP's environment to do some debugging and testing. Unfortunately, the PXE's BIOS functionality of that PC seems to be broken.

In case you need to boot a thinclient via PXE but its firmware doesn't support that function, you can solve the problem with gPXE as long as the network card is recognized as a PCI device (sadly that doesn't work if the device is PCMCIA or USB on most occasions). Also you'll must have a block device where to install grub (in this case grub2).

As I don't want to loose the data in that PC, installing gPXE directly in the HD (and thus converting the PC in a thinclient) is not an option. That would have been done by:

dd if=gPXE-for-usb.img of=/dev/sda

Don't do that ;-)

I know I can use a gPXE image for USB or CD, but that is a bit odd. The best option for me is to add an entry tro grub, so I can choose at grub menu to boot into my PC's own OS or doing a netboot.

Hands on!

The first thing we will do is getting a gPXE image from rom-o-matic.net. In order to get it we'll leave the default options as they are, and we'll just specify that the type of image we want is a «Linux kernel bootable image (.lkrn)»

Once we have it, we'll put the resulting .lkrn image at /boot/ directory:

/boot/gpxe-1.0.1-gpxe.lkrn

The way of working with grub2 is quite different from the classic grub; now we cannot edit a menu.lst. Instead, to add new entries in the grub menu we'll have to edit the file /etc/grub.d/40_custom (at least for debian or ubuntu).

We will edit /etc/grub.d/40_custom as follows:

#!/bin/sh
exec tail -n +3 $0
# This file provides an easy way to add custom menu entries.  Simply type the
# menu entries you want to add after this comment.  Be careful not to change
# the 'exec tail' line above.
menuentry "gPXE boot" {
linux16 /boot/gpxe-1.0.1-gpxe.lkrn
}

Finally execute update-grub2 that will update /boot/grub/grub.cfg:

update-grub2

In the next restart we will be able to choose the network boot option from the Grub menu.

Saturday, 17 April 2010

Installing vmware-server-2.0.2 in Ubuntu Lucid Lynx 10.04 LTS

spanish version - all english posts

Howto make work wmware-server-2.0.2 in Ubuntu 10.04 LTS lucid lynx

I'm using lucid's beta for a month. Today I remembered that I had not yet tested vmware-server on 10.04 lucid; so we will see how to solve the problems that may appear.

Basically we will do the same we did for karmic:

  1. install vmware-server
  2. apply the ubuntugeek's patch

But since the kernel version in lucid is 2.6.32 to get the vmware modules compile we will need to...

  1. manualy edit a couple of files:

    vmnet-only/vnetUserListener.c
    vmci-only/linux/vmciKernelIf.c
    

Note: at the end of this post there is a remark about vmware-tools in Ubuntu lucid 10.04 LTS guests

Lets summarize the process step by step:

First of all we need a basic build environment to compile the vmware modules; with the following commands we will install all the programs we'll need and its dependencies:

~# aptitude update
~# aptitude -y install build-essential linux-headers-$(uname -r) psmisc

Untar the vmware-server tarball that you have already download from vmware's site:

~# tar xvf VMware-server-2.0.2-203138.i386.tar.gz

We proceed to perform the installation:

~# cd /tmp/vmware-server-distrib/
~# ./vmware-install.pl

When the process arrives to the modules compilation step, we see the same error that happens in all the last ubuntu releases:

None of the pre-built vmmon modules for VMware Server is suitable for your
running kernel.  Do you want this program to try to build the vmmon module for
your system (you need to have a C compiler installed on your system)? [yes]

Using compiler "/usr/bin/gcc". Use environment variable CC to override.

What is the location of the directory of C header files that match your running
kernel? [/lib/modules/2.6.32-21-generic/build/include]

Extracting the sources of the vmmon module.

Building the vmmon module.

Using 2.6.x kernel build system.
make: Entering directory `/tmp/vmware-config1/vmmon-only'
make -C /lib/modules/2.6.32-21-generic/build/include/.. SUBDIRS=$PWD SRCROOT=$PWD/. modules
make[1]: Entering directory `/usr/src/linux-headers-2.6.32-21-generic'
  CC [M]  /tmp/vmware-config1/vmmon-only/linux/driver.o
In file included from /tmp/vmware-config1/vmmon-only/linux/driver.c:31:
/tmp/vmware-config1/vmmon-only/./include/compat_wait.h:78: error: conflicting types for 'poll_initwait'
include/linux/poll.h:70: note: previous declaration of 'poll_initwait' was here
In file included from /tmp/vmware-config1/vmmon-only/./include/vmware.h:38,
                 from /tmp/vmware-config1/vmmon-only/linux/driver.c:99:
/tmp/vmware-config1/vmmon-only/./include/vm_basic_types.h:108:7: warning: "__FreeBSD__" is not defined
In file included from /tmp/vmware-config1/vmmon-only/./common/vmx86.h:32,
                 from /tmp/vmware-config1/vmmon-only/linux/driver.h:29,
                 from /tmp/vmware-config1/vmmon-only/linux/driver.c:101:
/tmp/vmware-config1/vmmon-only/./include/x86msr.h:164:1: warning: "MSR_THERM2_CTL" redefined
In file included from /usr/src/linux-headers-2.6.32-21-generic/arch/x86/include/asm/msr.h:4,
                 from /usr/src/linux-headers-2.6.32-21-generic/arch/x86/include/asm/processor.h:21,
                 from include/linux/prefetch.h:14,
                 from include/linux/list.h:6,
                 from include/linux/module.h:9,
                 from /tmp/vmware-config1/vmmon-only/./include/compat_module.h:27,
                 from /tmp/vmware-config1/vmmon-only/linux/driver.c:26:
/usr/src/linux-headers-2.6.32-21-generic/arch/x86/include/asm/msr-index.h:227:1: warning: this is the location of the previous definition
In file included from /tmp/vmware-config1/vmmon-only/./include/vcpuset.h:103,
                 from /tmp/vmware-config1/vmmon-only/./include/modulecall.h:37,
                 from /tmp/vmware-config1/vmmon-only/./common/vmx86.h:33,
                 from /tmp/vmware-config1/vmmon-only/linux/driver.h:29,
                 from /tmp/vmware-config1/vmmon-only/linux/driver.c:101:
/tmp/vmware-config1/vmmon-only/./include/vm_atomic.h:329:7: warning: "_MSC_VER" is not defined
/tmp/vmware-config1/vmmon-only/./include/vm_atomic.h:333:7: warning: "_MSC_VER" is not defined
/tmp/vmware-config1/vmmon-only/./include/vm_atomic.h:401:7: warning: "_MSC_VER" is not defined
/tmp/vmware-config1/vmmon-only/./include/vm_atomic.h:407:7: warning: "_MSC_VER" is not defined
/tmp/vmware-config1/vmmon-only/./include/vm_atomic.h:506:7: warning: "_MSC_VER" is not defined
/tmp/vmware-config1/vmmon-only/./include/vm_atomic.h:595:7: warning: "_MSC_VER" is not defined
/tmp/vmware-config1/vmmon-only/./include/vm_atomic.h:684:7: warning: "_MSC_VER" is not defined
/tmp/vmware-config1/vmmon-only/./include/vm_atomic.h:773:7: warning: "_MSC_VER" is not defined
/tmp/vmware-config1/vmmon-only/./include/vm_atomic.h:775:7: warning: "_MSC_VER" is not defined
/tmp/vmware-config1/vmmon-only/./include/vm_atomic.h:860:7: warning: "_MSC_VER" is not defined
/tmp/vmware-config1/vmmon-only/./include/vm_atomic.h:862:7: warning: "_MSC_VER" is not defined
/tmp/vmware-config1/vmmon-only/./include/vm_atomic.h:945:7: warning: "_MSC_VER" is not defined
/tmp/vmware-config1/vmmon-only/./include/vm_atomic.h:947:7: warning: "_MSC_VER" is not defined
/tmp/vmware-config1/vmmon-only/./include/vm_atomic.h:1028:7: warning: "_MSC_VER" is not defined
/tmp/vmware-config1/vmmon-only/./include/vm_atomic.h:1030:7: warning: "_MSC_VER" is not defined
/tmp/vmware-config1/vmmon-only/./include/vm_atomic.h:1223:7: warning: "_MSC_VER" is not defined
/tmp/vmware-config1/vmmon-only/./include/vm_atomic.h:1227:7: warning: "_MSC_VER" is not defined
/tmp/vmware-config1/vmmon-only/./include/vm_atomic.h:1536:7: warning: "_MSC_VER" is not defined
/tmp/vmware-config1/vmmon-only/./include/vm_atomic.h:1663:7: warning: "_MSC_VER" is not defined
In file included from /tmp/vmware-config1/vmmon-only/./include/vm_basic_asm.h:46,
                 from /tmp/vmware-config1/vmmon-only/./include/rateconv.h:45,
                 from /tmp/vmware-config1/vmmon-only/./include/modulecall.h:40,
                 from /tmp/vmware-config1/vmmon-only/./common/vmx86.h:33,
                 from /tmp/vmware-config1/vmmon-only/linux/driver.h:29,
                 from /tmp/vmware-config1/vmmon-only/linux/driver.c:101:
/tmp/vmware-config1/vmmon-only/./include/vm_basic_asm_x86.h:62:7: warning: "_MSC_VER" is not defined
/tmp/vmware-config1/vmmon-only/./include/vm_basic_asm_x86.h:177:7: warning: "_MSC_VER" is not defined
/tmp/vmware-config1/vmmon-only/./include/vm_basic_asm_x86.h:346:7: warning: "_MSC_VER" is not defined
/tmp/vmware-config1/vmmon-only/./include/vm_basic_asm_x86.h:453:7: warning: "_MSC_VER" is not defined
In file included from /tmp/vmware-config1/vmmon-only/./include/vm_asm.h:43,
                 from /tmp/vmware-config1/vmmon-only/linux/driver.c:103:
/tmp/vmware-config1/vmmon-only/./include/vm_asm_x86.h:486:7: warning: "_MSC_VER" is not defined
/tmp/vmware-config1/vmmon-only/./include/vm_asm_x86.h:779:7: warning: "_MSC_VER" is not defined
/tmp/vmware-config1/vmmon-only/./include/vm_asm_x86.h:820:7: warning: "_MSC_VER" is not defined
/tmp/vmware-config1/vmmon-only/./include/vm_asm_x86.h:922:7: warning: "_MSC_VER" is not defined
In file included from /tmp/vmware-config1/vmmon-only/linux/driver.c:119:
/tmp/vmware-config1/vmmon-only/./common/hostif.h:53:7: warning: "WINNT_DDK" is not defined
/tmp/vmware-config1/vmmon-only/linux/driver.c: In function 'LinuxDriverSyncCallOnEachCPU':
/tmp/vmware-config1/vmmon-only/linux/driver.c:1423: error: too many arguments to function 'smp_call_function'
/tmp/vmware-config1/vmmon-only/linux/driver.c: In function 'LinuxDriver_Ioctl':
/tmp/vmware-config1/vmmon-only/linux/driver.c:1987: error: 'struct task_struct' has no member named 'euid'
/tmp/vmware-config1/vmmon-only/linux/driver.c:1987: error: 'struct task_struct' has no member named 'uid'
/tmp/vmware-config1/vmmon-only/linux/driver.c:1988: error: 'struct task_struct' has no member named 'fsuid'
/tmp/vmware-config1/vmmon-only/linux/driver.c:1988: error: 'struct task_struct' has no member named 'uid'
/tmp/vmware-config1/vmmon-only/linux/driver.c:1989: error: 'struct task_struct' has no member named 'egid'
/tmp/vmware-config1/vmmon-only/linux/driver.c:1989: error: 'struct task_struct' has no member named 'gid'
/tmp/vmware-config1/vmmon-only/linux/driver.c:1990: error: 'struct task_struct' has no member named 'fsgid'
/tmp/vmware-config1/vmmon-only/linux/driver.c:1990: error: 'struct task_struct' has no member named 'gid'
/tmp/vmware-config1/vmmon-only/linux/driver.c:2007: error: too many arguments to function 'smp_call_function'
make[2]: *** [/tmp/vmware-config1/vmmon-only/linux/driver.o] Error 1
make[1]: *** [_module_/tmp/vmware-config1/vmmon-only] Error 2
make[1]: Leaving directory `/usr/src/linux-headers-2.6.32-21-generic'
make: *** [vmmon.ko] Error 2
make: Leaving directory `/tmp/vmware-config1/vmmon-only'
Unable to build the vmmon module.

For more information on how to troubleshoot module-related problems, please
visit our Web site at "http://www.vmware.com/go/unsup-linux-products" and
"http://www.vmware.com/go/unsup-linux-tools".

Execution aborted.

Hmm, this sounds familiar; so hands-on. Download and install the ubuntugeek's patches:

~# wget -O - http://www.ubuntugeek.com/images/vmware-server.2.0.1_x64-modules-2.6.30.4-fix.tgz | tar xvfz -
~# ./vmware-server.2.0.1_x64-modules-2.6.30.4-fix.sh

But surprise, it ends up with errors:

[...]
/usr/lib/vmware/modules/source/vmnet-only/vm_basic_asm_x86.h:62:7: warning: "_MSC_VER" is not defined
/usr/lib/vmware/modules/source/vmnet-only/vm_basic_asm_x86.h:177:7: warning: "_MSC_VER" is not defined
/usr/lib/vmware/modules/source/vmnet-only/vm_basic_asm_x86.h:346:7: warning: "_MSC_VER" is not defined
/usr/lib/vmware/modules/source/vmnet-only/vm_basic_asm_x86.h:453:7: warning: "_MSC_VER" is not defined
/usr/lib/vmware/modules/source/vmnet-only/vnetUserListener.c: In function ‘VNetUserListenerEventHandler’:
/usr/lib/vmware/modules/source/vmnet-only/vnetUserListener.c:240: error: ‘TASK_INTERRUPTIBLE’ undeclared (first use in this function)
/usr/lib/vmware/modules/source/vmnet-only/vnetUserListener.c:240: error: (Each undeclared identifier is reported only once
/usr/lib/vmware/modules/source/vmnet-only/vnetUserListener.c:240: error: for each function it appears in.)
/usr/lib/vmware/modules/source/vmnet-only/vnetUserListener.c: In function ‘VNetUserListenerRead’:
/usr/lib/vmware/modules/source/vmnet-only/vnetUserListener.c:282: error: ‘TASK_INTERRUPTIBLE’ undeclared (first use in this function)
/usr/lib/vmware/modules/source/vmnet-only/vnetUserListener.c:282: error: implicit declaration of function ‘signal_pending’
/usr/lib/vmware/modules/source/vmnet-only/vnetUserListener.c:282: error: implicit declaration of function ‘schedule’
make[2]: *** [/usr/lib/vmware/modules/source/vmnet-only/vnetUserListener.o] Error 1
make[1]: *** [_module_/usr/lib/vmware/modules/source/vmnet-only] Error 2
make[1]: se sale del directorio `/usr/src/linux-headers-2.6.32-21-generic'
make: *** [vmnet.ko] Error 2
Sorry, problem compiling the vmnet module after it was patched
You must restore from this backup directory:
/usr/lib/vmware/modules/source-backup

Do not give up! Let's look for more information...

According to Noel at vmware communities we need to patch the following files:

vmnet-only/vnetUserListener.c
vmci-only/linux/vmciKernelIf.c

adding a «#include "compat_sched.h"» in each of them.

First of all lets restore the sources that we wrapped in our first attempt:

~# cd /usr/lib/vmware/modules
~# rm -r source
~# mv source-backup source

now modify the files the following way (I could have redo the ubuntugeek's patch adding these little modifications, but it's more work); so lets KISS.

First vnetUserListener.c:

~# cd source/
~# tar xvf vmnet.tar
~# vim vmnet-only/vnetUserListener.c

Among the #includes in that file add «#include "compat_sched.h"»; once done, re-pack the tar:

~# tar cvf vmnet.tar vmnet-only
~# rm -r vmnet-only

Now do the same with vmciKernelIf.c:

~# tar xvf vmci.tar
~# vim vmci-only/linux/vmciKernelIf.c

We again will add an «#include "compat_sched.h"» among the other includes. Finally re-pack the tar file:

~# tar cvf vmci.tar vmci-only/
~# rm -r vmci-only

After those little changes, run again the ubuntugeek's patch:

~# cd /tmp/
~# ./vmware-server.2.0.1_x64-modules-2.6.30.4-fix.sh
[...]
/usr/lib/vmware/modules/source/vmnet-only/vm_atomic.h:945:7: warning: "_MSC_VER" is not defined
/usr/lib/vmware/modules/source/vmnet-only/vm_atomic.h:947:7: warning: "_MSC_VER" is not defined
/usr/lib/vmware/modules/source/vmnet-only/vm_atomic.h:1028:7: warning: "_MSC_VER" is not defined
/usr/lib/vmware/modules/source/vmnet-only/vm_atomic.h:1030:7: warning: "_MSC_VER" is not defined
/usr/lib/vmware/modules/source/vmnet-only/vm_atomic.h:1223:7: warning: "_MSC_VER" is not defined
/usr/lib/vmware/modules/source/vmnet-only/vm_atomic.h:1227:7: warning: "_MSC_VER" is not defined
/usr/lib/vmware/modules/source/vmnet-only/vm_atomic.h:1536:7: warning: "_MSC_VER" is not defined
/usr/lib/vmware/modules/source/vmnet-only/vm_atomic.h:1663:7: warning: "_MSC_VER" is not defined
In file included from /usr/lib/vmware/modules/source/vmnet-only/vm_basic_asm.h:46,
                 from /usr/lib/vmware/modules/source/vmnet-only/vm_oui.h:28,
                 from /usr/lib/vmware/modules/source/vmnet-only/vnetInt.h:25,
                 from /usr/lib/vmware/modules/source/vmnet-only/vnetUserListener.c:36:
/usr/lib/vmware/modules/source/vmnet-only/vm_basic_asm_x86.h:62:7: warning: "_MSC_VER" is not defined
/usr/lib/vmware/modules/source/vmnet-only/vm_basic_asm_x86.h:177:7: warning: "_MSC_VER" is not defined
/usr/lib/vmware/modules/source/vmnet-only/vm_basic_asm_x86.h:346:7: warning: "_MSC_VER" is not defined
/usr/lib/vmware/modules/source/vmnet-only/vm_basic_asm_x86.h:453:7: warning: "_MSC_VER" is not defined
  LD [M]  /usr/lib/vmware/modules/source/vmnet-only/vmnet.o
  Building modules, stage 2.
  MODPOST 1 modules
  CC      /usr/lib/vmware/modules/source/vmnet-only/vmnet.mod.o
  LD [M]  /usr/lib/vmware/modules/source/vmnet-only/vmnet.ko
make[1]: se sale del directorio `/usr/src/linux-headers-2.6.32-21-generic'
cp -f vmnet.ko ./../vmnet.o
Replacing original file vsock.tar with patched file
Replacing original file vmci.tar with patched file
Replacing original file vmmon.tar with patched file
Replacing original file vmnet.tar with patched file
Done!

I have changed the files in here:
/usr/lib/vmware/modules/source

I have placed a backup of the original files in here:
/usr/lib/vmware/modules/source-backup

The original VMware modules directory is still in the way.
Please move this directory somewhere else, because it confuses VMware:
/usr/lib/vmware/modules/binary

This command should work now, to install the modules:
vmware-config.pl -d

We are almost done!

Install the modules (notice the '-d' flag; don't use it if you need to define non default settings or accept the license):

~# /usr/bin/vmware-config.pl -d
[...]

The installation of VMware VIX API 1.6.2 build-203138 for Linux completed
successfully. You can decide to remove this software from your system at any
time by invoking the following command: "/usr/bin/vmware-uninstall-vix.pl".

Enjoy,

--the VMware team

Starting VMware services:
   Virtual machine monitor                                             done
   Virtual machine communication interface                             done
   Virtual ethernet                                                    done
   Bridged networking on /dev/vmnet0                                   done
   Host-only networking on /dev/vmnet1 (background)                    done
   DHCP server on /dev/vmnet1                                          done
   Host-only networking on /dev/vmnet8 (background)                    done
   DHCP server on /dev/vmnet8                                          done
   NAT service on /dev/vmnet8                                          done
   VMware Server Authentication Daemon (background)                    done
   Shared Memory Available                                             done
Starting VMware management services:
   VMware Server Host Agent (background)                               done
   VMware Virtual Infrastructure Web Access
Starting VMware autostart virtual machines:
   Virtual machines                                                    done

The configuration of VMware Server 2.0.2 build-203138 for Linux for this
running kernel completed successfully.

Finally we have our new vmware 2.0.2 server working in our brand new Ubuntu Lucid Lynx 10.04

vmware-tools for ubuntu 10.04 guests

And what about vmware-tools in ubuntu 10.04 guests?

This issue may deserve it's own post, but as many of you will face this problem sooner or later; I've added this note about it at the end of this post.

I've tried to install the native vmware-tools in ubuntu 10.04 guests with no succeed.

Do not waste your time on it. There is a big lag between vmware and the new kernels

Instead of the vmware native tools install the opensource version in your guests as follows:

~# apt-get update
~# apt-get install --no-install-recommends open-vm-tools open-vm-dkms

The --no-install-recommends is to avoid the installation of X11 related packages as most of my gests have no gui.

So if your guest is a desktop leave off that flag and run:

~# apt-get update
~# apt-get install open-vm-tools open-vm-dkms

You'll see that with the opensource tools, you'll get most, if not all, the functionality you should have had with the native vmware-tools.

Saturday, 13 March 2010

Installing Asterisk and FreePBX on a vmware instance of Ubuntu 10.04 (Lucid) alpha3

spanish version - all english posts

I needed to test some PBX configurations but as I don't have a PBX at hand to use I thought that it would be interesting to test, at last, Asterisk. At the same time, it would be nice to test Ubuntu 10.04 just one month and a half before its release.

For the test I've created an instance of vmware-server 2.0 where I've installed a basic Ubuntu 10.04 Lucid alpha3 with up to date updates and static IP.

For the installation of Asterisk and its GUI FreePBX I've followed the script pointed out at Ubuntu's wiki which works in Ubuntu 9.10; Hence all credits should go to the script authors.

That said and after a quick look to the script I've decided to not execute it blindly. I've seen some oddities in it. For example, there is a "chown asterisk:asterisk /var/run"!. So I've preferred to make this step by step howto using the script as a basis.

Basically, the steps in this howto are the same in that script. However there are many changes in the syntax (because I prefer my own syntax). I've avoided some steps which I disliked. But I've resigned myself to commit other steps which maybe should be reorganized or even be rewritten. Maybe If I had more time for it I would have rewrote the script, but the job is just test a few things on a PBX and after all everything works which is what really matters.

We start with a basic and up to date instance of Lucid Alpha 3 on vmware server.

Steps:

Install mysql (You should enter the password for the mysql root user; for example 1234):

aptitude update
aptitude install -y mysql-server

Install all other dependencies we will need later:

aptitude install -y build-essential linux-headers-`uname -r` openssh-server bison flex apache2 php5 php5-curl php5-cli php5-mysql php-pear php-db php5-gd curl sox libncurses5-dev libssl-dev libmysqlclient15-dev mpg123 libxml2-dev

Download all the asterisk source packages that we are going to compile:

cd /usr/src/
xargs wget << SOURCES
http://downloads.asterisk.org/pub/telephony/dahdi-linux-complete/releases/dahdi-linux-complete-2.2.1+2.2.1.tar.gz
http://downloads.asterisk.org/pub/telephony/libpri/releases/libpri-1.4.10.2.tar.gz
http://downloads.asterisk.org/pub/telephony/asterisk/releases/asterisk-1.6.2.6.tar.gz
http://downloads.asterisk.org/pub/telephony/asterisk/releases/asterisk-addons-1.6.2.0.tar.gz
SOURCES

Once we have all the sources we will compile them. Reading the relevant configuration, at least read the README file, it is always a good idea.

Compile and install dahdi; problably unnecessary for our vmware instance, but it wont hurt:

tar xvf dahdi-linux-complete-2.2.1+2.2.1.tar.gz
cd dahdi-linux-complete-2.2.1+2.2.1
make all && make install && make config

libpri compilation and install:

cd ..
tar xvf libpri-1.4.10.2.tar.gz
cd libpri-1.4.10.2
make && make install

Now do the same with asterisk:

cd ..
tar xvf asterisk-1.6.2.6.tar.gz
cd asterisk-1.6.2.6
./configure
make && make install

Without forgetting to install the sample configurations:

make samples

Untar, compile and install the addons for asterisk:

cd ..
tar xvf asterisk-addons-1.6.2.0.tar.gz
cd asterisk-addons-1.6.2.0
./configure
make && make install

As before lets install the sample files:

make samples

Finally install the extra sounds for our new PBX:

cd /var/lib/astersik/sounds
wget -O - http://downloads.asterisk.org/pub/telephony/sounds/asterisk-extra-sounds-en-gsm-current.tar.gz | tar xvfz -

Now we start doing some adjustments to make our installation work. We create the user "asterisk" and add the apache user to the "asterisk" group (not sure if this is needed):

adduser asterisk --disabled-password --no-create-home --gecos "asterisk PBX user"
adduser www-data asterisk

Change the default user and group for apache to asterisk in apache2.conf (this is also a step that doesn't convince me much, but as it is just a test, lest follow the directives of the original script):

cp /etc/apache2/apache2.conf /etc/apache2/apache2.conf_orig
sed -i 's/^\(User\|Group\).*/\1 asterisk/' /etc/apache2/apache2.conf

In the original script it is also proposed to modify the sha-bang of the /usr/sbin/safe_asterisk script from sh to bash:

sed -i '1 {s/\<sh\>/bash/}' /usr/sbin/safe_asterisk

Now create the script that will manage the asterisk service. Here I haven't made any changes on the original script, I've just added the basic information (init info) that should carry every init script:

cat > /etc/init.d/asterisk <<-END_STARTUP
#!/bin/bash
### BEGIN INIT INFO
# Provides:          asterisk
# Required-Start:    \$network \$syslog
# Required-Stop:     \$network \$syslog
# Default-Start:     2 3 4 5
# Default-Stop:      0 1 6
# Short-Description: Asterisk daemon.
# Description:       This script handles start/stop states of asterisk.
### END INIT INFO

set -e
set -a
PATH=/usr/local/sbin:/usr/local/bin:/sbin:/bin:/usr/sbin:/usr/bin
DESC="Asterisk"
NAME=amportal
DAEMON=/usr/sbin/\$NAME

test -x \$DAEMON || exit 0

d_start() {
    amportal start
}

d_stop() {
    amportal stop
}

d_reload() {
    amportal restart
}

case "\$1" in

start)
    echo -n "Starting \$DESC: \$NAME"
    d_start
    echo "."
;;

stop)
    echo -n "Stopping \$DESC: \$NAME"
    d_stop
    echo "."
;;

restart|force-reload)
    echo -n "Restarting \$DESC: \$NAME"
    d_stop
    sleep 10
    d_start
    echo "."
;;

*)

    echo "Usage: \$SCRIPTNAME {start|stop|restart|force-reload}" >&2
    exit 3
;;

esac

exit 0
END_STARTUP

make appropriate modifications to the asterisk init script to make it available at booting:

chmod 755 /etc/init.d/asterisk
update-rc.d asterisk defaults 90 10

We are almost done. Now we are going to install FreePBX, the graphical interface that we will install to manage Asterisk (now here comes the chaos; IMHO the following steps reorganized would be better):

cd /usr/src/
wget -O - http://mirror.freepbx.org/freepbx-2.7.0.tar.gz | tar xvfz -
cd freepbx-2.7.0/

Copy amportal.conf configuration file to /etc/:

cp amportal.conf /etc/

Create the databases. Remember that we had used "1234" as the password for our mysql root user. Also we define a password for the asterisk database, eg 4321:

export MYSQL_ROOT_PW=1234
export ASTERISK_DB_PW=4321
mysqladmin -u root -p${MYSQL_ROOT_PW} create asterisk
mysqladmin -u root -p${MYSQL_ROOT_PW} create asteriskcdrdb
mysql -u root -p${MYSQL_ROOT_PW} asterisk < SQL/newinstall.sql
mysql -u root -p${MYSQL_ROOT_PW} asteriskcdrdb < SQL/cdr_mysql_table.sql
mysql -u root -p${MYSQL_ROOT_PW} <<-END_PRIVS
GRANT ALL PRIVILEGES ON asterisk.* TO asteriskuser@localhost IDENTIFIED BY "${ASTERISK_DB_PW}";
GRANT ALL PRIVILEGES ON asteriskcdrdb.* TO asteriskuser@localhost IDENTIFIED BY "${ASTERISK_DB_PW}";
flush privileges;
END_PRIVS

And slightly modify the settings in /etc/amportal.conf (in the original script this is done before installing freepbx, so we do it too):

sed -i "s/# \(AMPDBUSER=.*\)/\1/" /etc/amportal.conf
sed -i "s/# \(AMPDBPASS=\).*/\1${ASTERISK_DB_PW}/" /etc/amportal.conf
sed -i "s@\(AMPWEBROOT=\).*@\1/var/www/@"  /etc/amportal.conf
sed -i "s@\(FOPWEBROOT=\).*@\1/var/www/panel@" /etc/amportal.conf
sed -i "s@\(FOPWEBADDRESS=\).*@PUTIPADDRESS@" /etc/amportal.conf

Adjust some PHP.ini settings related to the use of memory (in the original script there are some changes that are not necessary for lucid):

sed -i 's/\(^upload_max_filesize = \).*/\120M/' /etc/php5/apache2/php.ini

Change the permissions of a series of directories:

chown asterisk. /var/run/asterisk
chown -R asterisk. /etc/asterisk
chown -R asterisk. /var/{lib,log,spool}/asterisk
chown -R asterisk. /var/www/

We enable the asterisk configuration as it is indicated in /etc/asterisk/asterisk.conf by removing the trailing characters in the first line:

sed -i '1 s/\(\[directories\]\).*/\1/' /etc/asterisk/asterisk.conf

At last! lets install freepbx:

./start_asterisk start
./install_amp

Restart apache2 and dahdi:

/etc/init.d/apache2 restart
/etci/init.d/dahdi restart

Finally (it seems necessary):

ln -s /var/lib/asterisk/moh /var/lib/asterisk/mohmp3
amportal start

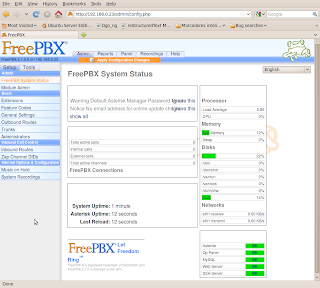
That's all; we can connect to the management interface of or new virtual ippbx at http://ip/admin/

A reboot shows that everything works!
Sunday, 21 February 2010

Unicode and Python

spanish version - all english posts

This weekend I had in mind posting a few notes about how to correctly use unicode when programming with python. But after reviewing my bookmarks and rereading the magnificent post All About Python and Unicode I have come to the conclusion that publishing anything related to unicode would be light years behind of that wonderful tutorial.

I recommend anyone of you interested in the use of unicode that take a cup of coffee and read All About Python and Unicode.

Therefore, instead of the notes I was about to post, I will just list three references I personally use when I have to review unicode and python:

There are many more links, possibly better and newer, but with these three is sufficient to understand properly the use of unicode in python.

Saturday, 13 February 2010

Fixing picture's date

spanish version - all english posts

I have a couple of bash scripts that I created when I bought my first digital camera back in 2003 or 2004. Those scripts allow me to clasify photos by date. The scripts use the date from the exif metadata that is embedded on each photo file header. That metadata is extracted using the strings command. With that timestamp the script renames each photo as YYYYMMDD_HHMMSS_#.jpg (the # indicates the number of the picture if several of them have the same timestamp). Also the scripts saves each photo in a folder tree of the form FOTOS/YYYY/MM.

With this system I have all the digital photos in a chronological order regardless the camera used to take them.

However, today, running the script to import photos from two of my digital cameras I've noticed that the pictures from one of the cameras had wrong timestamps. The camera which had wrong timestamps its a camera with a faulty battery and it seems that I made a mistake setting the date after the last reset. I set 2009 instead of current 2010 year. Nearly 200 photos will be bad classified if I don't find a cure for it.

Editing directly the ascii strings in the jpg header is useless, so a classical bash approach wont be useful... maybe some pythonic try with PIL... hmmm!

A quick search in Google shows a promising suggestion

jhead is a command line tool. If I had known it a few years ago I wouldn't have created the bash scripts for classifying photos. However I wouldn't have had the fun of creating them. jhead allows not only to display and manipulate exif's metadata but also allows to manipulate the photo files themselves.

Let me show you how to use jhead to fix the timestamp of the photos just in case you have the same problem I had. Of course, first you should install it (I use Ubuntu 9.10):

aptitude update && aptitude install jhead

Edit the picture files to change the date is as easy as running the following command. With this command I've managed to increase the timestamp in a year for 200+ photos in the SD card:

jhead -da2010:01:01-2009:01:01 *.jpg

jhead is well worth so I recommend that you take some time to read its manpage to see what it can offer (which is a lot).

Another example that I want to comment is how jhead manages to replace with in a single and simple command much of the functionality that implements the script that I use to sort my photos. Let's rename a picture in the form of YYYMMDD_HHMMSS.jpg using its metadata's timestamp:

~$ jhead -nf'%Y%m%d_%H%M%S' IMGP4890.JPG
IMGP4890.JPG --> 20100212_090624.jpg

Lovely!

As a tribute to my script (which has been working like a charm since 2004) I'm posting it below. Now that I know jhead my script will no longer be used... As you can see my old script in addition to rename the photos with their timestamp, as said before, the script moves them to a FOTOS/YYYY/MM directory tree structure, and it was able to manage photos with the same timestamp.

The script is a bit convoluted, reviewing it for writing this post I realize that my scripting technique has improved much over time, fortunately!:

#! /bin/bash
# vim:ts=4:sw=4:et:ft=sh
# $Source: camara_scripts/RCS/fotos_script_testTEST.sh,v $
# <hmontoliu@yahoo.es>
# 2004-01-13

: ${DESTDIR:="$HOME/FOTOS/"}
echo "Utilizando directorio destino: $DESTDIR"
echo
echo "OK (Ctrl-C aborta)?"; read foo

shopt -s extglob # for improved file pattern matching
for imgname in *.+(jpg|JPG);
do
    newname="$(head "$imgname"|strings|sed -n '/[0-9]\{4\}\:.*/ {s/ /_/g; s/://g; s/$/.jpg/; p}'|uniq)"
    eval $(echo $newname | sed -n 's/^\([0-9]\{4\}\)\([0-9]\{2\}\).*/year=\1 month=\2/p')
    mkdir -p ${DESTDIR}/$year/$month
    cp -v --backup=numbered --suffix=- "${imgname}" "${DESTDIR}/$year/$month/$newname"
done

# lets rename the xxx.jpg.~#~ generated by cp backup to xxx-#-.jpg
for file in $(find $DESTDIR -regex '.*~[0-9]+~')
do
    safenewname="$(echo $file | sed 's/\(.*\).jpg.~\(.[^~]*\)~/\1-\2.jpg/')"
    if [ -f "$safenewname" ]; then
        mv -iv "$file" "$safenewname"
    else
        mv -v "$file" "$safenewname"
    fi
done

I will stop using it; A new script with jhead and rename (perl's prerename) should be no more than two lines!

Tuesday, 26 January 2010

When did the system boot

spanish version - all english posts

The most common way to find out when was the last start is using the command "uptime":

root@blogspot:~# uptime
 22:28:20 up 22 days, 12:48,  1 user,  load average: 0.11, 0.04, 0.00

However that command doesn't tell us WHEN but HOW LONG!

Hence, only for curiosity, here are a few recipes to get that WHEN:

With "who":

root@blogspot:~# who -b
         system boot  2010-01-04 09:39

Using "last":

root@blogspot:~# last reboot
reboot   system boot  2.6.24-24-server Mon Jan  4 09:39 - 22:30 (22+12:51)

wtmp begins Mon Jan  4 09:34:08 2010

Unfortunately "last" depends on the "wtmp" registry which is regularily cleaned (depending on the distribution and how is logrotate configured). For this reason in servers with a high uptime the command "last reboot" is not quite useful.

Finally, the method I like best: Using the epoch timestamp from /proc/stat:

root@blogspot:~# date -d @$(sed -n 's/btime \(\d*\)/\1/p' /proc/stat)
Mon Jan  4 09:39:24 CET 2010

As usually, when I use sed, awk or grep I like to get their equivalents of each of them. So here are some alternatives of the above command (there are dozens of them):

With awk:

root@blogspot:~# date -d @$(awk '$1 ~ /btime/ {print $2}' /proc/stat)
Mon Jan  4 09:39:24 CET 2010

And with grep; in this case using it's perl regexp expressions compatibility:

root@blogspot:~# date -d @$(grep -Po '(?<=btime )(\d*)' /proc/stat)
Mon Jan  4 09:39:24 CET 2010

Saturday, 23 January 2010

Counting pages

spanish version - all english posts

We have an application that generates PDF reports from rst formated text files. One of the requirements that the applicaction should have is the numbering of pages in the format "Page X of Y". Unfortunaltely our application is an implemetation of rst2pdf 0.11 which doesn't have shuch feature (at least in the version we have). Although it wouldn't be too complex to implement it by modifying the code of python-docutils, this goes against my principles: Packages should be maintained by their developers at first instance, and by the distro packagers at second stage (in this case Ubuntu LTS 8.04). As an administrator I do not like altering this policy because then we must be aware of future security updates that may break things when our changes will be overriden.

I'm a bash guy, hence I always tend to prototype using the shell. So here is a quick way to implement a method to count the total pages of a PDF document w/o installing any specific tool.

Total PDF pages obtained by grep:

hmontoliu@blogspot:/tmp$ grep -c --binary-files=text '/Page\b' foo.pdf
818

Of course the package xpdf-utils includes the command "pdfinfo" which reports the number of pages in a document; but again, if you can avoid installing extra packages on a server much better.

The avobe command also applies to ps documents with minor modifications:

hmontoliu@blogspot:/tmp$ grep -c '%%Page' bar.ps
5

More information at "man grep" :-)

Implementing this simple grep in python as a call to the shell or doing a grep-like stuff through re or string.count('text') is trivial; for example:

In [1]: with open('/tmp/foo.pdf','rb') as f:
   ...:     f.read().count('/Page>')
   ...:
   ...: 

Out[1]: 818

Sunday, 17 January 2010

vmware-server-2.0.2 in ubuntu karmic

spanish version - all english posts

Update: I've written a post about the installation of vmware-server 2.0.x in Ubuntu 10.04 Lucid Lynx

Direct installation of VMware-server-2.0.2-203138.i386.tar.gz in Ubuntu 9.10 karmic exits with error when trying to compile the vmmon module:

[...]

None of the pre-built vmmon modules for VMware Server is suitable for your
running kernel.  Do you want this program to try to build the vmmon module for
your system (you need to have a C compiler installed on your system)? [yes]

Using compiler "/usr/bin/gcc". Use environment variable CC to override.

What is the location of the directory of C header files that match your running
kernel? [/lib/modules/2.6.31-17-generic/build/include]

Extracting the sources of the vmmon module.

Building the vmmon module.

Using 2.6.x kernel build system.
make: se ingresa al directorio `/tmp/vmware-config3/vmmon-only'
make -C /lib/modules/2.6.31-17-generic/build/include/.. SUBDIRS=$PWD SRCROOT=$PWD/. modules
make[1]: se ingresa al directorio `/usr/src/linux-headers-2.6.31-17-generic'
  CC [M]  /tmp/vmware-config3/vmmon-only/linux/driver.o
In file included from /tmp/vmware-config3/vmmon-only/linux/driver.c:31:
/tmp/vmware-config3/vmmon-only/./include/compat_wait.h:78: error: conflicting types for ‘poll_initwait’
include/linux/poll.h:70: note: previous declaration of ‘poll_initwait’ was here
In file included from /tmp/vmware-config3/vmmon-only/./include/vmware.h:38,
                 from /tmp/vmware-config3/vmmon-only/linux/driver.c:99:
/tmp/vmware-config3/vmmon-only/./include/vm_basic_types.h:108:7: warning: "__FreeBSD__" is not defined
In file included from /tmp/vmware-config3/vmmon-only/./include/vcpuset.h:103,
                 from /tmp/vmware-config3/vmmon-only/./include/modulecall.h:37,
                 from /tmp/vmware-config3/vmmon-only/./common/vmx86.h:33,
                 from /tmp/vmware-config3/vmmon-only/linux/driver.h:29,
                 from /tmp/vmware-config3/vmmon-only/linux/driver.c:101:
/tmp/vmware-config3/vmmon-only/./include/vm_atomic.h:329:7: warning: "_MSC_VER" is not defined
/tmp/vmware-config3/vmmon-only/./include/vm_atomic.h:333:7: warning: "_MSC_VER" is not defined
/tmp/vmware-config3/vmmon-only/./include/vm_atomic.h:401:7: warning: "_MSC_VER" is not defined
/tmp/vmware-config3/vmmon-only/./include/vm_atomic.h:407:7: warning: "_MSC_VER" is not defined
/tmp/vmware-config3/vmmon-only/./include/vm_atomic.h:506:7: warning: "_MSC_VER" is not defined
/tmp/vmware-config3/vmmon-only/./include/vm_atomic.h:595:7: warning: "_MSC_VER" is not defined
/tmp/vmware-config3/vmmon-only/./include/vm_atomic.h:684:7: warning: "_MSC_VER" is not defined
/tmp/vmware-config3/vmmon-only/./include/vm_atomic.h:773:7: warning: "_MSC_VER" is not defined
/tmp/vmware-config3/vmmon-only/./include/vm_atomic.h:775:7: warning: "_MSC_VER" is not defined
/tmp/vmware-config3/vmmon-only/./include/vm_atomic.h:860:7: warning: "_MSC_VER" is not defined
/tmp/vmware-config3/vmmon-only/./include/vm_atomic.h:862:7: warning: "_MSC_VER" is not defined
/tmp/vmware-config3/vmmon-only/./include/vm_atomic.h:945:7: warning: "_MSC_VER" is not defined
/tmp/vmware-config3/vmmon-only/./include/vm_atomic.h:947:7: warning: "_MSC_VER" is not defined
/tmp/vmware-config3/vmmon-only/./include/vm_atomic.h:1028:7: warning: "_MSC_VER" is not defined
/tmp/vmware-config3/vmmon-only/./include/vm_atomic.h:1030:7: warning: "_MSC_VER" is not defined
/tmp/vmware-config3/vmmon-only/./include/vm_atomic.h:1223:7: warning: "_MSC_VER" is not defined
/tmp/vmware-config3/vmmon-only/./include/vm_atomic.h:1227:7: warning: "_MSC_VER" is not defined
/tmp/vmware-config3/vmmon-only/./include/vm_atomic.h:1536:7: warning: "_MSC_VER" is not defined
/tmp/vmware-config3/vmmon-only/./include/vm_atomic.h:1663:7: warning: "_MSC_VER" is not defined
In file included from /tmp/vmware-config3/vmmon-only/./include/vm_basic_asm.h:46,
                 from /tmp/vmware-config3/vmmon-only/./include/rateconv.h:45,
                 from /tmp/vmware-config3/vmmon-only/./include/modulecall.h:40,
                 from /tmp/vmware-config3/vmmon-only/./common/vmx86.h:33,
                 from /tmp/vmware-config3/vmmon-only/linux/driver.h:29,
                 from /tmp/vmware-config3/vmmon-only/linux/driver.c:101:
/tmp/vmware-config3/vmmon-only/./include/vm_basic_asm_x86.h:62:7: warning: "_MSC_VER" is not defined
/tmp/vmware-config3/vmmon-only/./include/vm_basic_asm_x86.h:177:7: warning: "_MSC_VER" is not defined
/tmp/vmware-config3/vmmon-only/./include/vm_basic_asm_x86.h:346:7: warning: "_MSC_VER" is not defined
/tmp/vmware-config3/vmmon-only/./include/vm_basic_asm_x86.h:453:7: warning: "_MSC_VER" is not defined
In file included from /tmp/vmware-config3/vmmon-only/./include/vm_asm.h:43,
                 from /tmp/vmware-config3/vmmon-only/linux/driver.c:103:
/tmp/vmware-config3/vmmon-only/./include/vm_asm_x86.h:486:7: warning: "_MSC_VER" is not defined
/tmp/vmware-config3/vmmon-only/./include/vm_asm_x86.h:779:7: warning: "_MSC_VER" is not defined
/tmp/vmware-config3/vmmon-only/./include/vm_asm_x86.h:820:7: warning: "_MSC_VER" is not defined
/tmp/vmware-config3/vmmon-only/./include/vm_asm_x86.h:922:7: warning: "_MSC_VER" is not defined
In file included from /tmp/vmware-config3/vmmon-only/linux/driver.c:119:
/tmp/vmware-config3/vmmon-only/./common/hostif.h:53:7: warning: "WINNT_DDK" is not defined
/tmp/vmware-config3/vmmon-only/linux/driver.c: In function ‘LinuxDriverSyncCallOnEachCPU’:
/tmp/vmware-config3/vmmon-only/linux/driver.c:1423: error: too many arguments to function ‘smp_call_function’
/tmp/vmware-config3/vmmon-only/linux/driver.c: In function ‘LinuxDriver_Ioctl’:
/tmp/vmware-config3/vmmon-only/linux/driver.c:1987: error: ‘struct task_struct’ has no member named ‘euid’
/tmp/vmware-config3/vmmon-only/linux/driver.c:1987: error: ‘struct task_struct’ has no member named ‘uid’
/tmp/vmware-config3/vmmon-only/linux/driver.c:1988: error: ‘struct task_struct’ has no member named ‘fsuid’
/tmp/vmware-config3/vmmon-only/linux/driver.c:1988: error: ‘struct task_struct’ has no member named ‘uid’
/tmp/vmware-config3/vmmon-only/linux/driver.c:1989: error: ‘struct task_struct’ has no member named ‘egid’
/tmp/vmware-config3/vmmon-only/linux/driver.c:1989: error: ‘struct task_struct’ has no member named ‘gid’
/tmp/vmware-config3/vmmon-only/linux/driver.c:1990: error: ‘struct task_struct’ has no member named ‘fsgid’
/tmp/vmware-config3/vmmon-only/linux/driver.c:1990: error: ‘struct task_struct’ has no member named ‘gid’
/tmp/vmware-config3/vmmon-only/linux/driver.c:2007: error: too many arguments to function ‘smp_call_function’
make[2]: *** [/tmp/vmware-config3/vmmon-only/linux/driver.o] Error 1
make[1]: *** [_module_/tmp/vmware-config3/vmmon-only] Error 2
make[1]: se sale del directorio `/usr/src/linux-headers-2.6.31-17-generic'
make: *** [vmmon.ko] Error 2
make: se sale del directorio `/tmp/vmware-config3/vmmon-only'
For more information on how to troubleshoot module-related problems, please
visit our Web site at "http://www.vmware.com/go/unsup-linux-products" and
"http://www.vmware.com/go/unsup-linux-tools".

Execution aborted.

Unable to build the vmmon module.

To fix it we must download the ubuntugeek's patch for vmware-server 2.0.1 x64 modules. Yes, the patch for 64-bit fixes the 32-bit package:

root@blogger:/tmp# wget -O - http://www.ubuntugeek.com/images/vmware-server.2.0.1_x64-modules-2.6.30.4-fix.tgz | tar xvfz -

Once we have the patch file and the script that installs it we do:

root@blogger:/tmp# ./vmware-server.2.0.1_x64-modules-2.6.30.4-fix.sh
[...]
Replacing original file vmnet.tar with patched file
Replacing original file vsock.tar with patched file
Replacing original file vmmon.tar with patched file
Replacing original file vmci.tar with patched file
Done!

I have changed the files in here:
/usr/lib/vmware/modules/source

I have placed a backup of the original files in here:
/usr/lib/vmware/modules/source-backup

The original VMware modules directory is still in the way.
Please move this directory somewhere else, because it confuses VMware:
/usr/lib/vmware/modules/binary

This command should work now, to install the modules:
vmware-config.pl -d

Voila! re-run «vmware-config.pl -d» and enjoy that vmware finally works:

root@blogger:/tmp# vmware-config.pl -d
[...]
Starting VMware services:
   Virtual machine monitor                                             done
   Virtual machine communication interface                             done
   Virtual ethernet                                                    done
   Bridged networking on /dev/vmnet0                                   done
   Host-only networking on /dev/vmnet1 (background)                    done
   DHCP server on /dev/vmnet1                                          done
   Host-only networking on /dev/vmnet8 (background)                    done
   DHCP server on /dev/vmnet8                                          done
   NAT service on /dev/vmnet8                                          done
   VMware Server Authentication Daemon (background)                    done
   Shared Memory Available                                             done
Starting VMware management services:
   VMware Server Host Agent (background)                               done
   VMware Virtual Infrastructure Web Access
Starting VMware autostart virtual machines:
   Virtual machines                                                    done

The configuration of VMware Server 2.0.2 build-203138 for Linux for this
running kernel completed successfully.